|
|
 |
|||||||||||||||||||||||||||||||||||||||||||||||||||||||||||||||||||||||||||||||||||||||||||
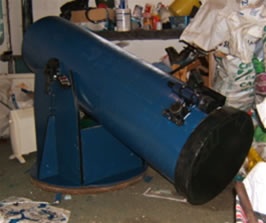
The 16" Dobsonian Refurbishment Project
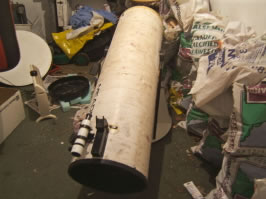
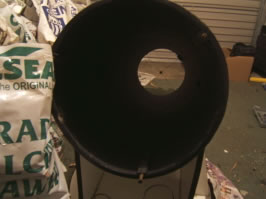
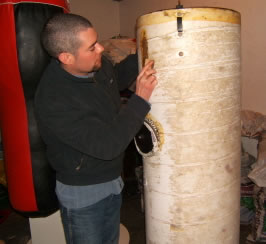
Getting Started - Full Aperture Dust CapAfter much thought on the refurbishment of my 16" Dobsonian, I realized that I was wasting time considering different options instead of doing anything about it. The moon was moving out of the evening sky very briefly, leaving a very short dark window for observing so I needed to get this scope sorted out or I would never get observing with the 16”. I decided to make a full aperture dust cap out of cardboard. I know this sounds crazy. I used cardboard, a combination of cello tape, and insulating tape to make a circular lid 20 inches wide and with side’s approx 3 inches long. I painted the inside and outside matt black and applied two coats of sealer. This took several hours spread out over three days because of drying times but it is now finished. It is hard, water proof and simply slides on and off but is not loose enough that it will slide off itself. Simple and it looks pretty good too. It has not been tested in the field yet, however that will take place soon. I was also thinking of making two more full aperture dust caps in the future. One with twin off axis holes for planetary observing (Masking down) and another with say a 4 inch off axis hole covered with Baader solar filter for solar observing which would be fun. While I was at it I made dust caps for two of my 8x50 mm finders using spare plastic Meade eyepiece cases. |
|||||||||||||||||||||||||||||||||||||||||||||||||||||||||||||||||||||||||||||||||||||||||||
|
|
|
|||||||||||||||||||||||||||||||||||||||||||||||||||||||||||||||||||||||||||||||||||||||||
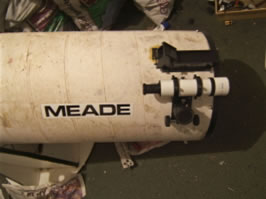
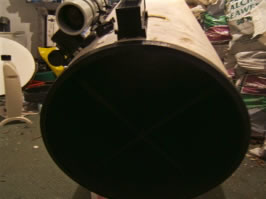
Reducing Internal ReflectionsI applied two coats of matt black paint to the tube interior, the inside focuser draw tube, the primary mirror housing, all of which will reduce internal reflections and improve image contrast. This was a difficult process as I had to crawl inside the tube and hand paint it into the tube wall which was a little claustrophobic, being in such close proximity to the paint made me feel sick for several days.
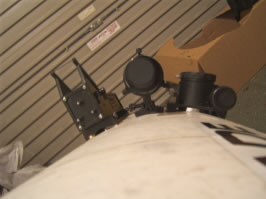
The whole tube is 66” long and 19” wide, it had practically swallowed me whole, my boots protruding from the bottom of the tube were all that was visible of me, it must have been an unusual sight for any passing neighbours! In the process, I managed to bump the top of my head against one of the rear tube mirror housing bolts and split my head, apart from the pain I continued on working with the scope until Conor arrived and told me my head was bleeding very badly. I have dried and cleaned the rocker box and re - attached the JMI NGC MICRO MAX digital setting circle encoders on both axes. Telrad And Finder PositionAfter a little drilling and screwing I have relocated the positions of the 8x50 mm focuser and Telrad which are now secured firmly to the OTA and placed above and very close to the focuser so they are now more user friendly for my height. Previously the altitude wheels at the side of the tube that slide into the grooves on the rocker box moved independently from the tube itself. This felt annoying when guiding the tube vertically, made extremely loud creaking sounds that are typical of the Meade Starfinder dobsonians and also caused extreme accuracy problems within the declination reading on the digital setting circles and made them unusable. I fixed this problem by drilling two holes through each wheel into the tube and screwed in two large bolts. I painted the inside and outside bolt ends matt black again to reduce reflections. Now the wheels move in synch with the tube, don’t creak anymore, guide better and will improve the JMI read out. The tube is now a joy to move in altitude and I will be able to observe through the finder / Telrad at objects near the zenith with greater ease. Cleaning The Primary And Secondary
I carefully removed the primary and secondary mirror and brought them inside. I rinsed them constantly in luke warm water and used cotton wool balls to lightly clean the surface. For this I swiped in one direction only, then rinsed with a generous amount of home made distilled water. My optics are far from perfect but the dirt the cotton wool pads had collected was both surprising and reassuring, this will certainly improve the image. I let them drip dry and did this process twice as water drops tend to dry onto the surface in blobs or streaks. It helps to store the mirror as vertically as possible within reason without it falling over and place towels in its vicinity. Remember to advise family members NOT to touch your optics, in fact store them away from any potential harm altogether. Note that you should only ever clean your optics if you feel it is an absolute necessity, I heard of one guy who has cleaned is primary only once in 30 years. For most cases dust is the offender and can easily be removed. I did not even want to touch mine, the images I get through the 16” are great but dried in dirty water streaks have covered much of the mirror so that is why I have took this chance to clean it which should brighten the field of view. Azimuth Motion ProblemsThe azimuth motion of my rocker box is very stiff indeed, the weight on the Teflon pads has increased due to water absorption which has also caused the particle board to expand. I dried and cleaned these and rubbed polish into the Teflon pads however this is by no means a long term solution. I would like to get a new rocker box made for me (any volunteers?) that will move with just a light touch like mine used to do when I first got it. I also plan on attaching two black handles on to the tube, one underneath the tube directly opposite the finder and the other on top of the tube at its midway section. These handles will help me a lot as my type of observing involves a lot of sweeping around the sky and will stop me from yanking the end tube ring and kinking the tube itself. I have already been in contact with Mark Stronge about suitable handles which I will get attached in the near future. If you were to look at the outside of my scope it would look like it has not been refurbished yet, however to a trained eye who has seen it before there is a distinct difference to the inside. All of these little touches will add up to improve my hours spent at the eyepiece. Altogether I have spent five days working on my telescope and because of this I feel I know every single nut and bolt in it and I feel it has been time well spent. Painting The Tube ExteriorI had planned to start observing as the eastward moving moon would have disappeared from the evening sky by then, thrusting the sky into a sudden but short period of darkness before the moon would again rise in the NE. I had planned to take advantage of this short dark sky window for over a week however as the evening arrived, the weather started to change. What had been clear skies and sunshine for most of the day had developed into complete overcast conditions and it looked it could stay this way for sometime. Even though I had planned to paint the outside of the tube around the next full moon, I decided to change that plan immediately and take advantage of clouds and free time to further my refurbishment programme.
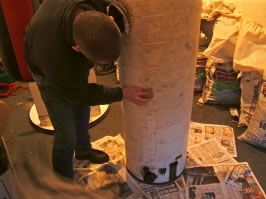
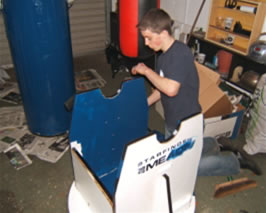
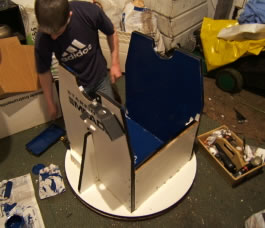
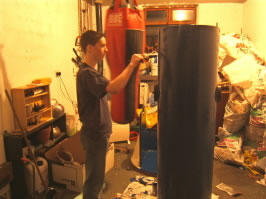
I had to rush to the local paint shop before closing time, though I had originally planned to use spray paint on the optical tube assembly (OTA) just as everyone had advised me however, I was having trouble finding the correct colour and size / volume of spray can. None of my local shops could provide me with much help in this area so in a last minute decision I decided that I did not want to waste time and would attempt the task by the traditional style of hand painting. After careful scanning of the various coloured tins I found the colour I had wanted...OXFORD BLUE! (Satin Finish) This paint was designed so it only needed one coat and in preparation to its application, I removed the OTA from the rocker box and placed it vertically on the newspapers spread out on the garage floor and made sure the tube's primary mirror end pointed to the ceiling as I did not want to risk the primary mirror housing screws (the ones that split my head open!) from bending under weight if placed in the other configuration. Prior to this I had removed the primary mirror, secondary mirror, 8X50 mm Finder scope + bracket and Telrad, I tore off strips of newspaper, rolled them and cello taped them together and fastened these around the altitude wheels and sections of the focuser to try and reduce paint splash on these regions then used sand paper to lightly sand down the tube, the reason is to make the surface rough enough for the paint to grip the tube however I found this created more problems because my tube was made of spiral wound sonotube, sections of cardboard started to peel and blister and I stopped immediately as this was something I did NOT want. I rubbed the tube down with a cloth instead and decided that the tube was 'rough' enough anyway to begin. As arranged Conor arrived to help me, we were both dressed in old clothes which was good etiquette as we were soon covered in paint.
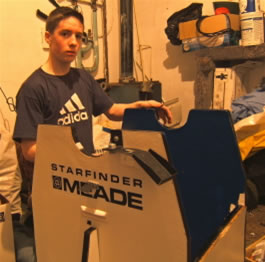
We both began painting the OTA using hand rollers. At the beginning, I was becoming extremely anxious as the paint did not stay on the tube and the white surface underneath forced its way through, however, after further work we realized that we were applying the paint too lightly so we changed our technique which had an immediate positive affect on the tube. Now things where beginning to look good and we covered a lot of surface very quickly, in fact surprisingly quickly much to my delight. Conor Mc Donald (neighbour and observing partner) was very good at getting a good thick smooth coat on at a fast rate, mean while I switched to a hand brush to get at the trickier areas the rollers could not get to and after no time at all we had covered most of the tube then we turned our attention to the rocker box, I removed the JMI NGC MICRO MAX digital setting circle cables and hand box then we got busy painting again. Conor covered a lot of ground with the roller and I got the other regions with the brush before long we finished the job quickly and had a great time doing this while listening to the radio. It was a great way of spending a cloudy Friday night!
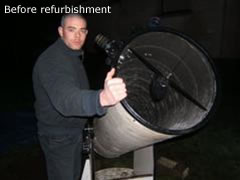
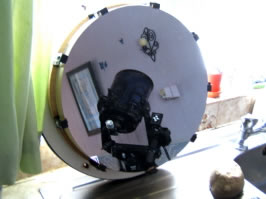
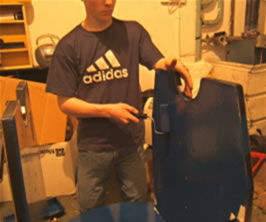
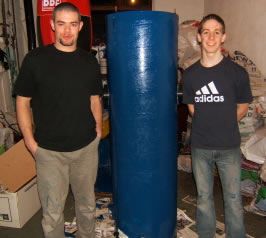
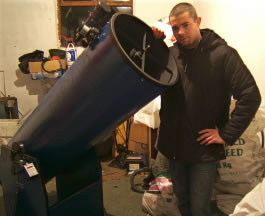
I got up early on the following morning which turned out to be a lovely warm sunny Saturday. When I opened the garage to get some air around the scope sections, I noticed some white patches through the lighter areas of paint which we had missed the previous night due to poor lighting conditions. So, my mother and I took some time covering these up with more paint. I did more touching up with a thin brush and left everything to dry for a while longer as the paint normally takes six hours to touch dry. As our garage is a little damp I decided to wait it out a little longer and used a portable heater near the tube to speed this process along. Hours later, the sky was cloudy again so I used this time to apply a light coat of sealer over the tube and rocker box which was very quick to do with the roller. The sealer took one hour to dry but after 2.5 hours I came out again and applied a second coat and left everything to dry for a second night however it did not take us long to notice that all this exposure to paint and sealer in a confined space went to our heads, we both felt a little sick and needed fresh air. Luckily the sky cleared and as an excuse to get some 'fresh air' we decided to have a late night observing session, using my ETX and Conor’s 10" dobsonian, on loan from my local astronomical society, we had a great time observing the Moon, Jupiter, Saturn and C/2004 Q2 Machholz... an amazing night. Touching UpOn Sunday I placed the mirror face down on clean blocks of polystyrene and painted the back of the mirror housing board then later with sealer. I placed the OTA on the rocker box and attached the JMI hand unit and cables / encoders. I followed this by attaching the primary / secondary mirror, the finder bracket and the Telrad, though something was odd about the complete telescope. The finder that comes with the Starfinder is white which does not match the born again colour of my 'new' scope but I had a solution. I own a Meade 8" SCT whose colour is very close to that of the 16" so I simply put its 8X50 Finder on the 16" and the white on the 8" and there was my problem solved! As you can see from the various images I took, the difference is striking! Just check the image of the 16" and myself at the top of this page and compare it with the final image (inside and outside of tube) then you can see that the change is significant. I am very happy with it indeed. I will take it outside soon and test the scope in the field during this monthly dark period and see how it performs in the open. If needs be, I will put on another coat and sealer.
Future PlansNext on my refurbishment programme... 1) Attach two sweeping handles to OTA (handles are in transit as I write this...thanks to Mark Stronge) 2) Purchase a 2" high quality focuser (possibly from JMI or focuser of that standard) 3) Purchase 8X50 mm right angle, erect image finder (black or Blue) 4) Develop a more pleasing counter balance system on rear of tube. 5) Improve azimuth motion of rocker box or build a complete new one. 6) Build 16” long extension dew shield. 7) Possibly design some kind of dolly for rocker box? Or… 8) Get a roll - off roof observatory or at least some kind of light structure to house the scope in, that I can remove easily for observing. 9) Attach a smaller telescope (probably reflector) piggyback on main tube for making magnitude estimates of brighter telescopic comets. Stay tuned for further updates. Martin McKenna HOMEAlso see... Meet The Scopes
|
|||||||||||||||||||||||||||||||||||||||||||||||||||||||||||||||||||||||||||||||||||||||||||